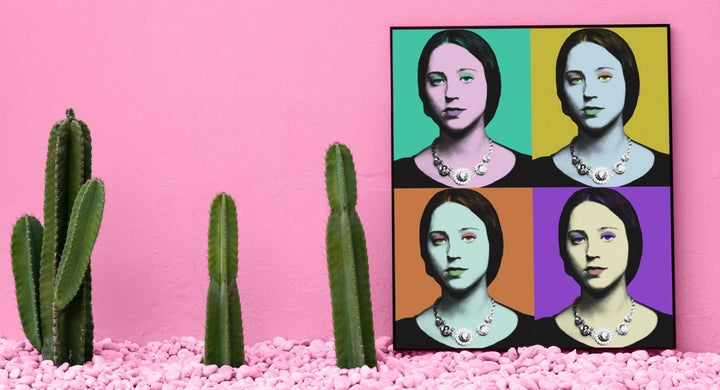
These days, a photo’s never just a photo. Thanks to our obsession with filters, editing tools, emoji and cartoon embellishments, turning our pics into GIFs, and all the other crazy and amazing things we do to images, the first picture you take is just the first step towards your final masterpiece.
Add a splash of colour to any wall, have a fun crafting session with the kids and give your favourite photos an artistic, pop-art inspired finish based on Warhol’s timeless silk screens with a little Photoshop magic (and this handy tutorial below from our creative pals at the HP Envy Tumblr site).
Using a high-quality printer, your pop-art prints can soon be decorating your mantlepiece and walls for a fun, art-gallery ambiance. Keyboard and mouse at the ready – time to unleash your inner photo editor with this fun project.
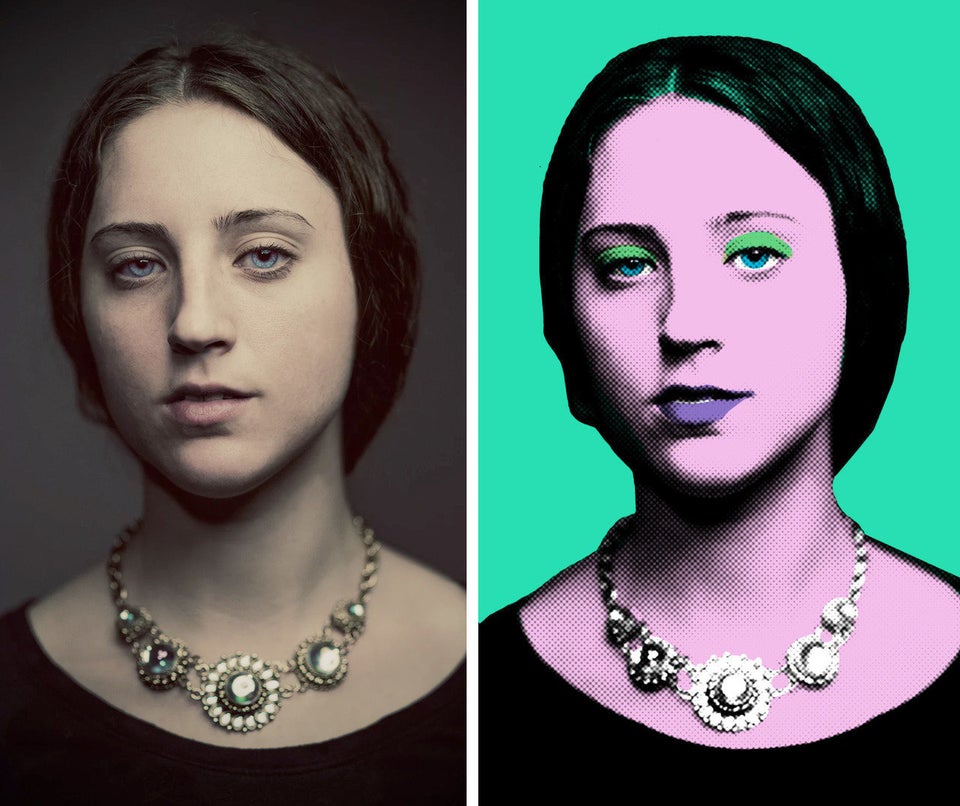
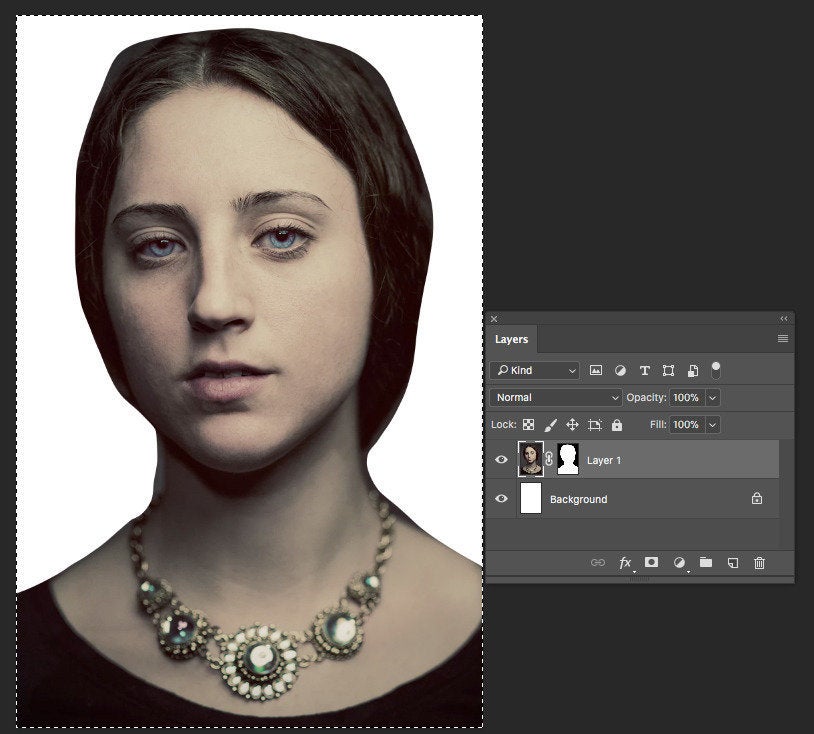
There are various tools in Photoshop that you can use to separate your backdrop from the people in the photo (e.g. lasso tool, pen) – we’ve created our image using the brush tool, but you can use whichever one you find easiest.
First, click on the vector mask icon – the light grey rectangle with dark grey circle inside that you’ll find in the Layers window – this is useful for hiding certain portions of the layer and revealing layers underneath.
Use your brushtool to trace around the shape/shapes you want to edit – draw around the face or faces to isolate them and colour out the background. A size of 10px is crisp and easy to draw with – even if you’re not Picasso. Remember: whatever you colour black becomes invisible; white will be visible. Your background should now be transparent.
Top tip: If your picture is looking like a Jackson Pollock rather than a Warhol and you’ve clearly made a mistake but can’t remember quite where you went wrong, you can check on the history of everything you’ve done with your picture and click back to a previous step without having to start all over again using the History panel (go to Window – History).
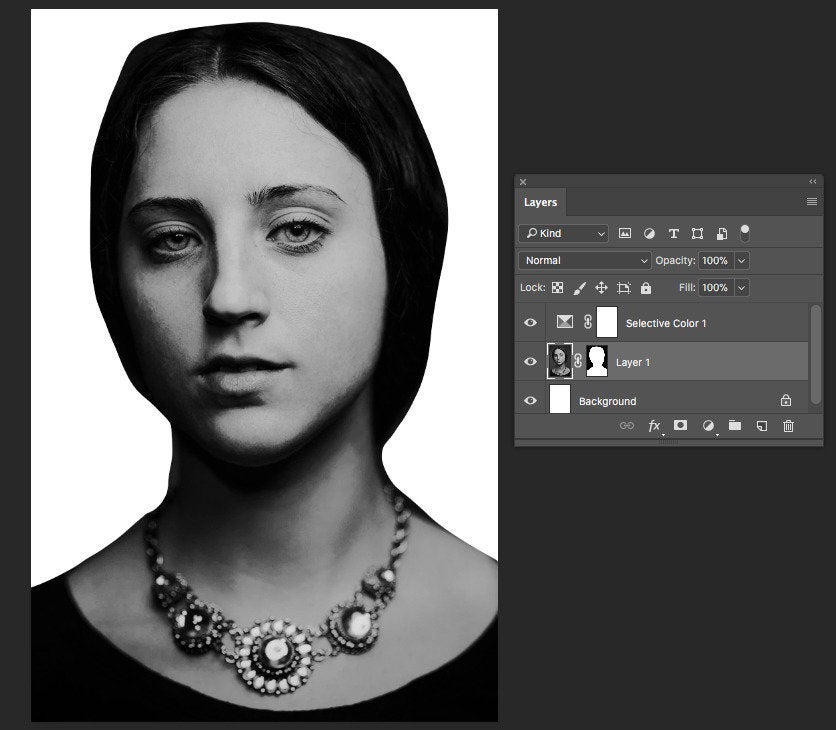
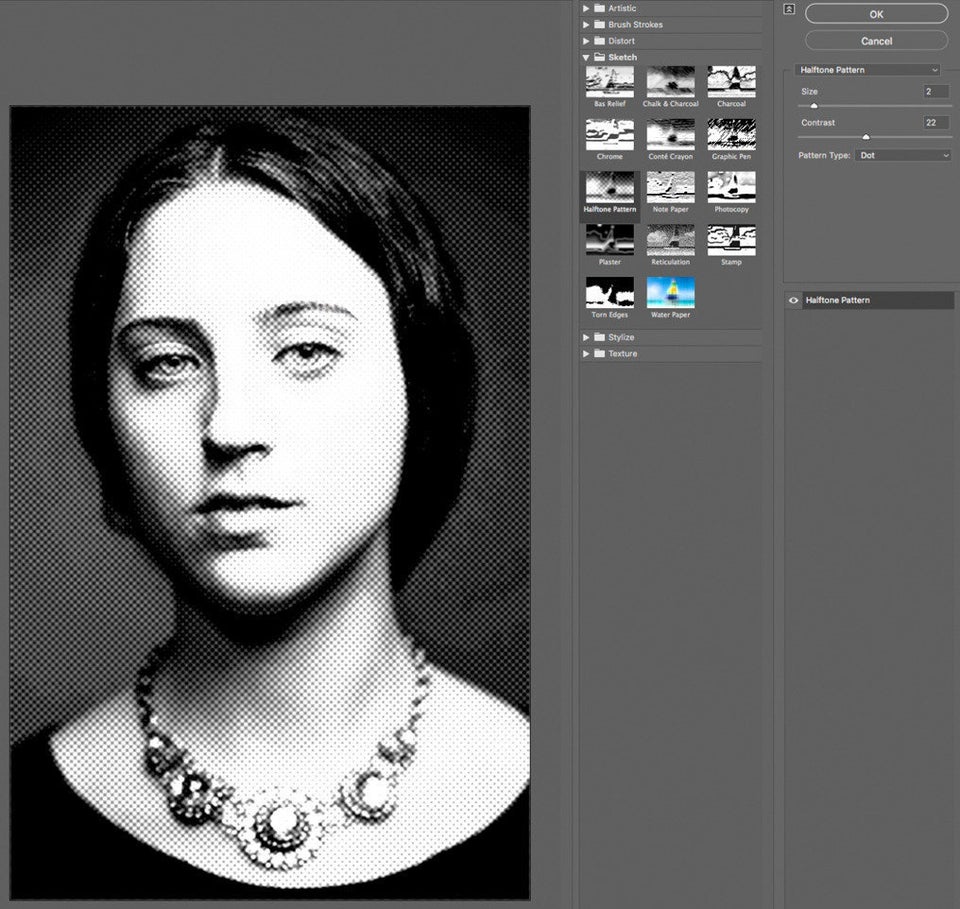
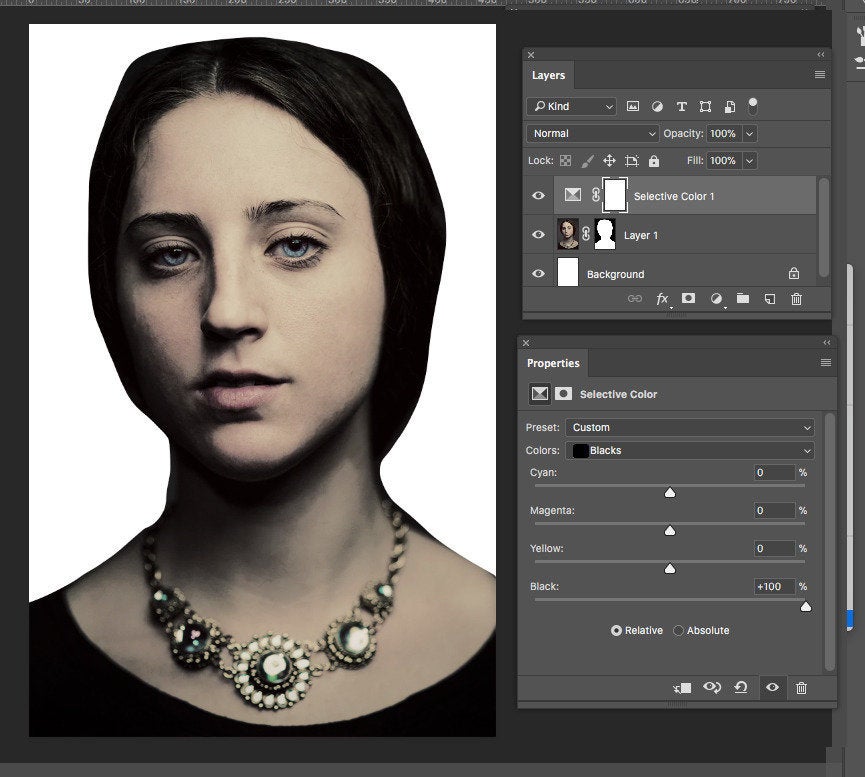
We used Dots, Size: 2 and Contrast: 22 for these images, but it is image-specific, so play around. If your background comes back, not to worry - it should disappear again when you start applying your filters.
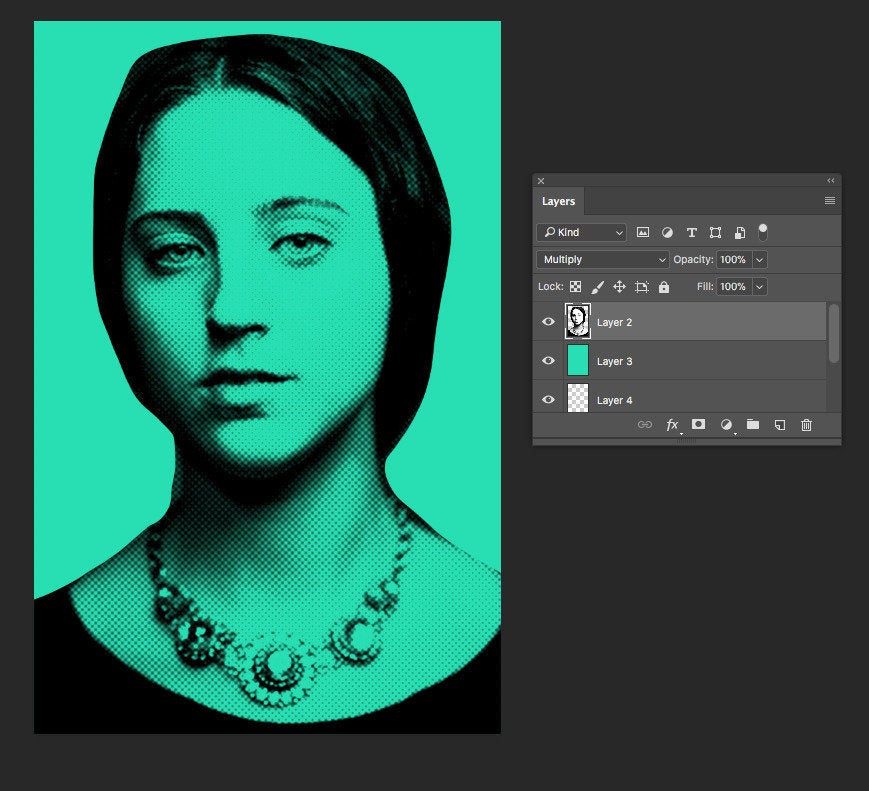
Continue adding layers to isolate each element like hair, eyes, skin tone, lips, teeth, T-shirt, jewellery, etc. You can do as many or as few as you like – changing just the hair and lips is enough to make it a full-on Pop Art portrait.
Use the Paint Brush (or Pencil) tool to paint in each element a different colour (or use the Lasso plus Layer Mask to crop each element out and then add colour to each new one). The brighter, the better.
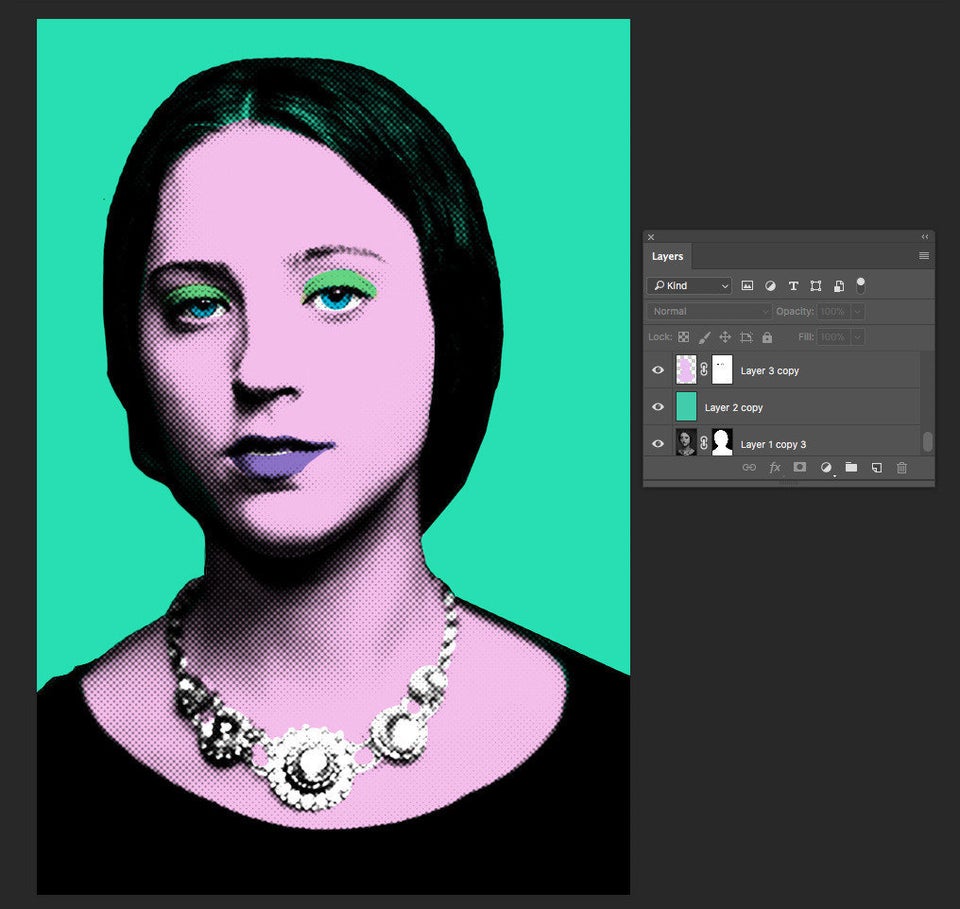
If you’re looking for a more vintage/retro feel to your image, choose Filter - Noise - Dust and Scratches to soften the image.
Fun shortcut: If you have one of the newer versions of Adobe Photoshop Elements, you can cheat – and still have an amazing-looking end product. Click on Guided, then go to Fun Edits, and then select Transform your image into Pop Art. Just choose a style, convert your image to Bitmap, add a colour fill adjustment layer and then click Duplicate image. Warhol would be SO impressed.
Make the most of your family memories with an HP Envy Photo Printer, the best home printing that technology has to offer. Print professional-looking photos directly from your smartphone or wirelessly from your PC, and create stunning works of art you can display around the house… and use in family craft sessions with the kids.